This page presents the OrthographicCamera class and usage. The orthographic camera is to be used in 2D environments only as it implements a parallel (orthographic) projection and there will be no scale factor for the final image regardless where the objects are placed in the world.
Code for a simple example of a Camera zooming and moving is available on https://libgdxinfo.wordpress.com
Description
The Camera class operates as a very simple real world camera. It is possible to
- move and rotate the camera around,
- zoom in and out,
- change the viewport,
- project/unproject points to and from window coordinate/ world space
Using the camera is the easy way to move around a game world without having to manually operate on the matrices. All the projection and view matrix operations are hidden in the implementation.
The position field referes to the position of the center of the camera. The camera extends the selected viewport of the world so this matches the screen size of the device.
The following little app demonstrates the use of a simple OrthographicCamera to move around a flat world.
import com.badlogic.gdx.ApplicationListener;
import com.badlogic.gdx.Gdx;
import com.badlogic.gdx.Input;
import com.badlogic.gdx.graphics.GL20;
import com.badlogic.gdx.graphics.OrthographicCamera;
import com.badlogic.gdx.graphics.Texture;
import com.badlogic.gdx.graphics.g2d.Sprite;
import com.badlogic.gdx.graphics.g2d.SpriteBatch;
import com.badlogic.gdx.math.MathUtils;

public class OrthographicCameraExample implements ApplicationListener {

	static final int WORLD_WIDTH = 100;
	static final int WORLD_HEIGHT = 100;

	private OrthographicCamera cam;
	private SpriteBatch batch;

	private Sprite mapSprite;
	private float rotationSpeed;

	@Override
	public void create() {
		rotationSpeed = 0.5f;

		mapSprite = new Sprite(new Texture(Gdx.files.internal("sc_map.png")));
		mapSprite.setPosition(0, 0);
		mapSprite.setSize(WORLD_WIDTH, WORLD_HEIGHT);

		float w = Gdx.graphics.getWidth();
		float h = Gdx.graphics.getHeight();

		// Constructs a new OrthographicCamera, using the given viewport width and height
		// Height is multiplied by aspect ratio.
		cam = new OrthographicCamera(30, 30 * (h / w));

		cam.position.set(cam.viewportWidth / 2f, cam.viewportHeight / 2f, 0);
		cam.update();

		batch = new SpriteBatch();
	}

	@Override
	public void render() {
		handleInput();
		cam.update();
		batch.setProjectionMatrix(cam.combined);

		Gdx.gl.glClear(GL20.GL_COLOR_BUFFER_BIT);

		batch.begin();
		mapSprite.draw(batch);
		batch.end();
	}

	private void handleInput() {
		if (Gdx.input.isKeyPressed(Input.Keys.A)) {
			cam.zoom += 0.02;
		}
		if (Gdx.input.isKeyPressed(Input.Keys.Q)) {
			cam.zoom -= 0.02;
		}
		if (Gdx.input.isKeyPressed(Input.Keys.LEFT)) {
			cam.translate(-3, 0, 0);
		}
		if (Gdx.input.isKeyPressed(Input.Keys.RIGHT)) {
			cam.translate(3, 0, 0);
		}
		if (Gdx.input.isKeyPressed(Input.Keys.DOWN)) {
			cam.translate(0, -3, 0);
		}
		if (Gdx.input.isKeyPressed(Input.Keys.UP)) {
			cam.translate(0, 3, 0);
		}
		if (Gdx.input.isKeyPressed(Input.Keys.W)) {
			cam.rotate(-rotationSpeed, 0, 0, 1);
		}
		if (Gdx.input.isKeyPressed(Input.Keys.E)) {
			cam.rotate(rotationSpeed, 0, 0, 1);
		}

		cam.zoom = MathUtils.clamp(cam.zoom, 0.1f, 100/cam.viewportWidth);

		float effectiveViewportWidth = cam.viewportWidth * cam.zoom;
		float effectiveViewportHeight = cam.viewportHeight * cam.zoom;

		cam.position.x = MathUtils.clamp(cam.position.x, effectiveViewportWidth / 2f, 100 - effectiveViewportWidth / 2f);
		cam.position.y = MathUtils.clamp(cam.position.y, effectiveViewportHeight / 2f, 100 - effectiveViewportHeight / 2f);
	}

	@Override
	public void resize(int width, int height) {
		cam.viewportWidth = 30f;
		cam.viewportHeight = 30f * height/width;
		cam.update();
	}

	@Override
	public void resume() {
	}

	@Override
	public void dispose() {
		mapSprite.getTexture().dispose();
		batch.dispose();
	}

	@Override
	public void pause() {
	}

}
import com.badlogic.gdx.backends.lwjgl3.Lwjgl3Application;
import com.badlogic.gdx.backends.lwjgl3.Lwjgl3ApplicationConfiguration;

public class DesktopLauncher {
	public static void main (String[] arg) {
		Lwjgl3ApplicationConfiguration config = new Lwjgl3ApplicationConfiguration();
		config.setForegroundFPS(60);
		config.setTitle("orthographic-camera-example");
		new Lwjgl3Application(new OrthographicCameraExample(), config);
	}
}
The above class is the libGDX application that will use the orthographic camera to move around the world. Our world size is in arbitrary units that we can define however we want to. In this specific case, our world is 100x100 units.
    static final int WORLD_WIDTH = 100;
    static final int WORLD_HEIGHT = 100;
Many people make the mistake of thinking in pixels when it comes to their world, and this is something that you should avoid doing. It leads to unnecessary multiplying and dividing by constants, having weird “Pixel per unit” ratios dotted around your code, poor understanding of the pipeline and it confuses you! There are many other problems, which can be easily avoided when you stop “thinking” in pixels.
What are these units though? What do they mean? How will I know what size to make objects? How many units are displayed on the screen? We will get to that shortly! Stick tight.
	private OrthographicCamera cam;  #1
	private SpriteBatch batch;       #2

	private Sprite mapSprite;        #3
	private float rotationSpeed;     #4
#1 - The OrthographicCamera instance we will control to look at the world.
#2 - The SpriteBatch instance we will use to render our world
#3 - A Sprite that we will use to draw our world map
#4 - Rotation speed for rotating our camera
@Override
public void create() {
	rotationSpeed = 0.5f;                                                    #1

	mapSprite = new Sprite(new Texture(Gdx.files.internal("sc_map.png")));   #2
	mapSprite.setPosition(0, 0);                                             #3
	mapSprite.setSize(WORLD_WIDTH, WORLD_HEIGHT);                            #4

	float w = Gdx.graphics.getWidth();                                       #5
	float h = Gdx.graphics.getHeight();                                      #6
	cam = new OrthographicCamera(30, 30 * (h / w));                          #7
	cam.position.set(cam.viewportWidth / 2f, cam.viewportHeight / 2f, 0);    #8
	cam.update();                                                            #9

	batch = new SpriteBatch();                                               #10
}
The create method is called when we create a new instance of our ApplicationListener, and it is where we initialize our variables
#1 - Sets the current rotation speed to 0.5 degree.
#2 - Creates our Sprite, from a new Texture that uses the file: sc_map.png Download the file here, rename it to sc_map.png and place it in the assets/ directory.
#3 - We set the position of our mapSprite to 0,0.(This isn’t strictly required as the Sprite has default x,y of 0,0 anyway.)
#4 - We set the size of mapSprite, with width of WORLD_WIDTH and height of WORLD_HEIGHT. So our sprite now has dimensions of 100x100, or the size of our world.
#5 - We create a local variable that has the value of the current width of our application display. (This is in pixels)
#6 - We create a local variable that has the value of the current height of our application display. (This is in pixels)
#7 - We Create the OrthographicCamera. The 2 parameters specify the width and height of the viewport that will be created. These values determine how much of our world we can see in each axis.
In our example, we use 30 for our viewport width, and 30 * (h / w) for our viewport height. The width is trivial, we can see 30 units in the X axis. For the viewport height we use 30 multiplied by the aspect ratio of our display. This is so we see objects we draw in correct proportions. Imagine if we ignored the aspect ratio, and just went with viewport width and height of 30, unless we have a square display, which we most likely don’t, when we render an object that has dimensions of 30x30 for example, it would show as a squished rectangle with the same shape as our display. How can an object that is 30x30 not be a square? This is because we assumed 30 viewport width and 30 viewport height, which doesn’t match the aspect ratio of our device.
Some examples -

If we created our camera with viewport width of 100 and viewport height of 100 ('new OrthographicCamera(100, 100)') and centered it correctly, we would be able to see the 'whole' map, our 'whole' world at once.

If we created our camera with viewport width of 100 and viewport height of 50 ('new OrthographicCamera(100, 50)') we would be able to see 'half' of the map at any given time

If we created our camera with viewport width of 50 and viewport height of 50 ('new OrthographicCamera(50, 50)') we would be able to see a 'quarter' of the map at any given time
#8 - Setting the camera’s initial position to the bottom left of the map. But… the camera’s position is in the center of the camera.
So we need to offset the camera’s position by +half viewport width and +half viewport height so that the bottom left of our camera is actually at 0,0.
#9 - Update our camera! This step is vital to call whenever we have manipulated our camera as it updates all the matrices under the hood.
#10 - Create our SpriteBatch instance.
And we are setup! So let’s get rendering and manipulating the camera.
@Override
public void render() {
	handleInput();                             #1
	cam.update();                              #2
	batch.setProjectionMatrix(cam.combined);   #3

	Gdx.gl.glClear(GL20.GL_COLOR_BUFFER_BIT);  #4

	batch.begin();                             #5
	mapSprite.draw(batch);                     #6
	batch.end();                               #7
}
#1 - Controls the camera by updating its position, zooming, rotation based on different keys being pressed.
#2 - Updates our OrthographicCamera, we have just manipulated it with handleInput() method, so we must remember to call the update() method.
#3 - Updates our SpriteBatch instance with our Camera’s view and projection matrices.
#4 - Clears the screen (actually the colour buffer).
#5 - Begin our SpriteBatch
#6 - Draw our mapSprite!
#7 - End our SpriteBatch
Let’s take a deeper look at controlling our camera, which is all handled in our handleInput() method.
	private void handleInput() {
		if (Gdx.input.isKeyPressed(Input.Keys.A)) {
			cam.zoom += 0.02;
			//If the A Key is pressed, add 0.02 to the Camera's Zoom
		}
		if (Gdx.input.isKeyPressed(Input.Keys.Q)) {
			cam.zoom -= 0.02;
			//If the Q Key is pressed, subtract 0.02 from the Camera's Zoom
		}
		if (Gdx.input.isKeyPressed(Input.Keys.LEFT)) {
			cam.translate(-3, 0, 0);
			//If the LEFT Key is pressed, translate the camera -3 units in the X-Axis
		}
		if (Gdx.input.isKeyPressed(Input.Keys.RIGHT)) {
			cam.translate(3, 0, 0);
			//If the RIGHT Key is pressed, translate the camera 3 units in the X-Axis
		}
		if (Gdx.input.isKeyPressed(Input.Keys.DOWN)) {
			cam.translate(0, -3, 0);
			//If the DOWN Key is pressed, translate the camera -3 units in the Y-Axis
		}
		if (Gdx.input.isKeyPressed(Input.Keys.UP)) {
			cam.translate(0, 3, 0);
			//If the UP Key is pressed, translate the camera 3 units in the Y-Axis
		}
		if (Gdx.input.isKeyPressed(Input.Keys.W)) {
			cam.rotate(-rotationSpeed, 0, 0, 1);
			//If the W Key is pressed, rotate the camera by -rotationSpeed around the Z-Axis
		}
		if (Gdx.input.isKeyPressed(Input.Keys.E)) {
			cam.rotate(rotationSpeed, 0, 0, 1);
			//If the E Key is pressed, rotate the camera by rotationSpeed around the Z-Axis
		}

		cam.zoom = MathUtils.clamp(cam.zoom, 0.1f, 100/cam.viewportWidth);

		float effectiveViewportWidth = cam.viewportWidth * cam.zoom;
		float effectiveViewportHeight = cam.viewportHeight * cam.zoom;

		cam.position.x = MathUtils.clamp(cam.position.x, effectiveViewportWidth / 2f, 100 - effectiveViewportWidth / 2f);
		cam.position.y = MathUtils.clamp(cam.position.y, effectiveViewportHeight / 2f, 100 - effectiveViewportHeight / 2f);
	}
So we can see that this method polls Keys, if a certain key is pressed, we do something to the camera.
The last 5 lines are responsible for keeping the camera within the bounds of our world.
We need to make sure the camera’s zoom does not grow or shrink to values that would invert our world, or show too much of our world. To do this, we can calculate the effectiveViewportWidth and effectiveViewportHeight, which are just the viewportWidth/height * zoom (this gives us what we can see in the world given the current zoom). We can then clamp the value of the camera’s zoom to values we require. 0.1f to prevent being too zoomed in. 100/cam.viewportWidth to prevent us being able to see more than the world’s entire width.
The last two lines are responsible for making sure we can’t translate out of the world boundaries. < 0, or more than 100 in either Axis.
What to do when the application changes size? This is when you implement different strategies for handling devices with different resolutions/aspect ratios. I will include a few basic strategies to give you the basic idea.
If you want a slightly higher level method of handling this, you should use viewports -> Wiki Article on Viewports
The following resize strategy will ensure that you will always see 30 units in the x axis no matter what pixel-width your device has.
	@Override
	public void resize(int width, int height) {
		cam.viewportWidth = 30f;                 // Viewport of 30 units!
		cam.viewportHeight = 30f * height/width; // Lets keep things in proportion.
		cam.update();
	}
The following resize strategy will show less/more of the world depending on the resolution
	@Override
	public void resize(int width, int height) {
		cam.viewportWidth = width/32f;  //We will see width/32f units!
		cam.viewportHeight = cam.viewportWidth * height/width;
		cam.update();
	}
The main application to bootstrap the listener is a simple LWJGL application.
	public static void main(String[] args) {
		new LwjglApplication(new OrthographicCameraExample());
	}
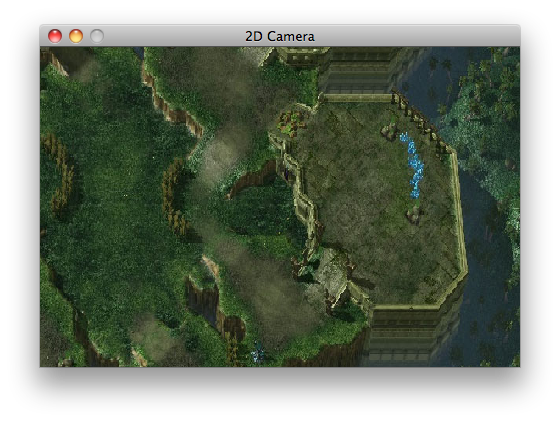
The result is the following application:
Most of the time, one should not need to access the internals of a camera as the most common use-cases are covered by the following methods:
| Method | Description |
|---|---|
lookAt(float x, float y, float z) |
Recalculates the direction of the camera to look at the point defined by the coordinates on all axes. - The z axis is ignored for 2D |
translate(float x, float y, float z) |
Moves the camera by the given amount on each axis. - Note that z is ignored for the OrthographicCamera |
rotate(float angle, float axisX, float axisY, float axisZ) |
Rotates the direction and up vector of this camera by the given angle around the given axis. The direction and up vector will not be orthogonalized. The angle is persisted so the camera will be rotated by angle relative to its previous rotation. |
update() |
Recalculates the projection and view matrix of the camera and the frustum planes |