Dear ImGui is a popular C++ GUI library. If you want to use it in your libGDX application as an alternative for Scene2D, there are different options for doing so. You can either use one of the Java bindings from ice1000/jimgui, SpaiR/imgui-java and xpenatan/gdx-imgui, or you can use the Kotlin port at kotlin-graphics/imgui. See below for a couple examples.
General Information
Dear ImGui is designed to enable fast iteration and empower programmers to create content creation tools and visualization/debug tools (as opposed to UI for the average end-user). It favors simplicity and productivity toward this goal, and thus lacks certain features normally found in more high-level libraries.
A common misunderstanding is to think that immediate mode gui == immediate mode rendering, which usually implies hammering your driver/GPU with a bunch of inefficient draw calls and state changes, as the gui functions are called by the user. This is NOT what Dear ImGui does. Dear ImGui outputs vertex buffers and a small list of draw calls batches. It never touches your GPU directly. The draw call batches are decently optimal and you can render them later, in your app or even remotely.
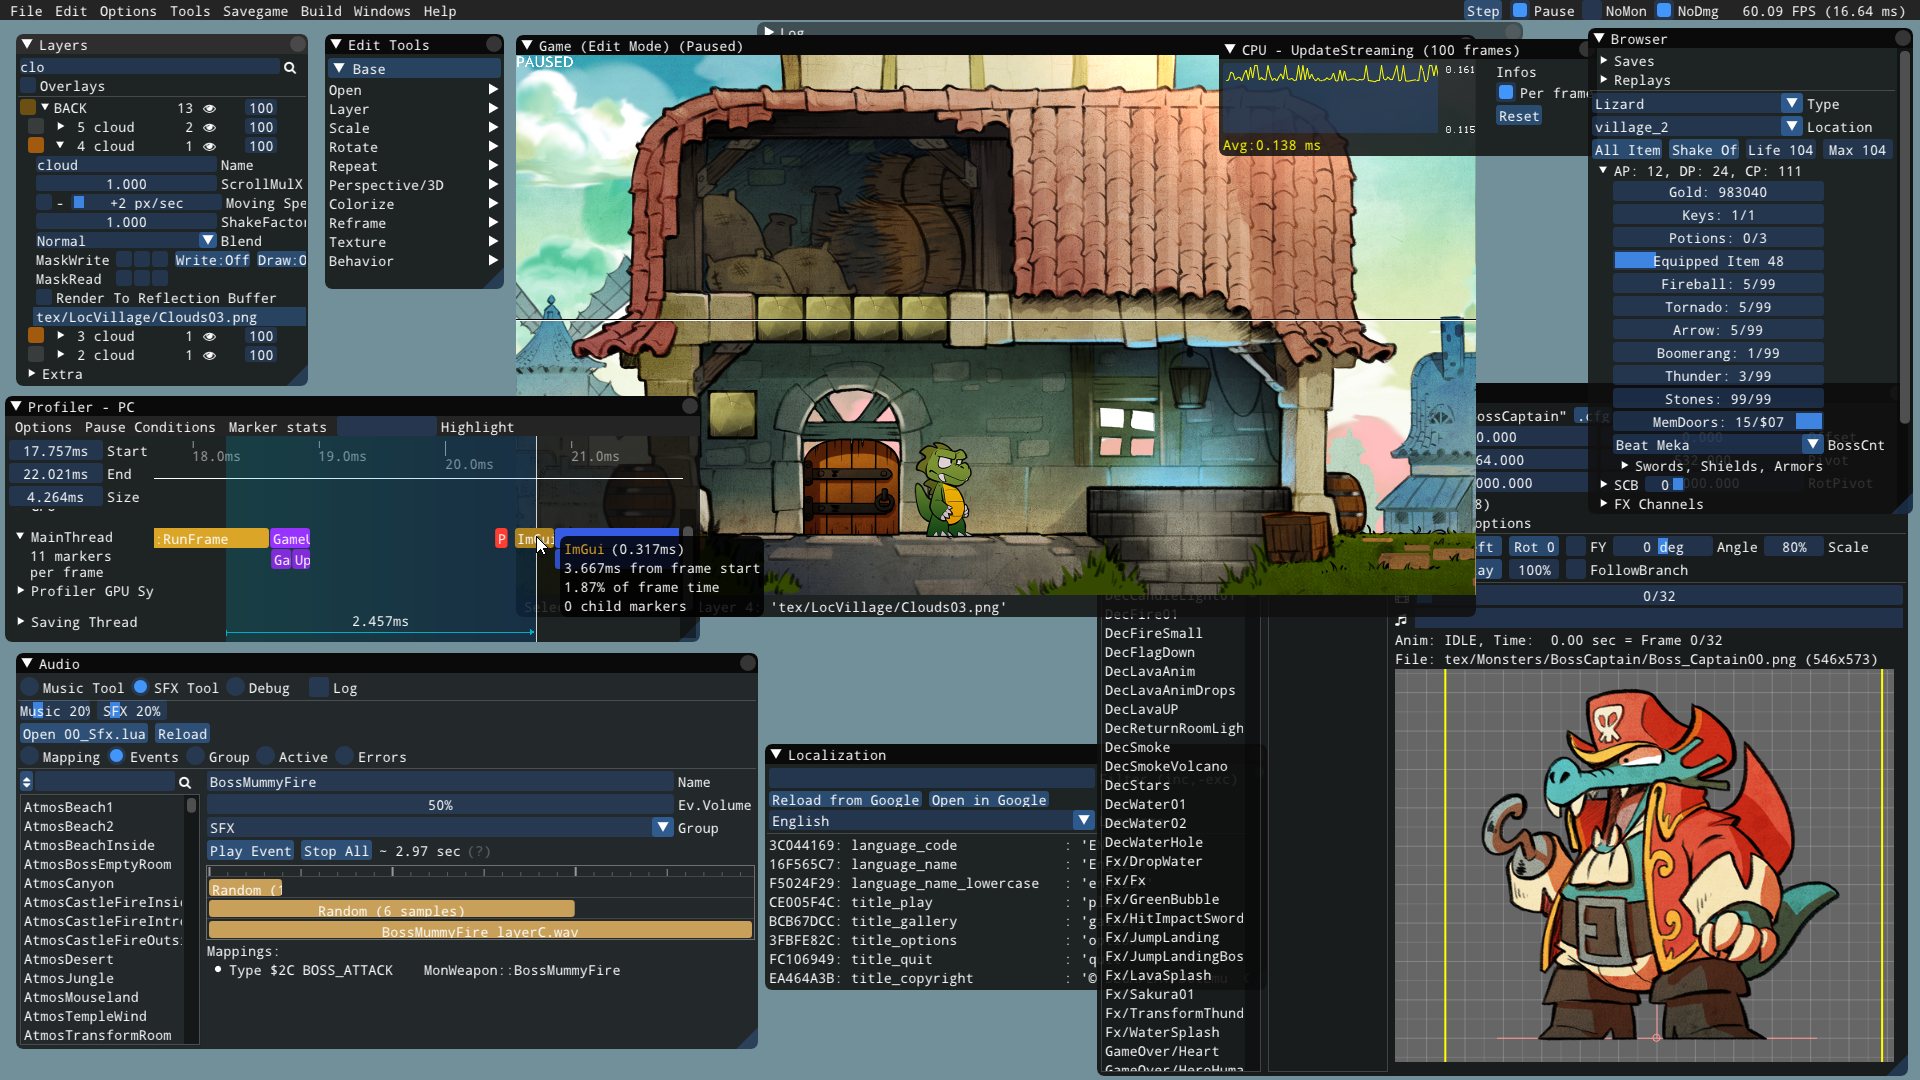
This is an example demonstrating what ImGui is capable of:
Option 1: SpaiR’s Bindings
The first option for using ImGui with libGDX are the Java bindings over at github.com/SpaiR/imgui-java.
Required Dependencies for the LWJGL 3 Subproject
api "io.github.spair:imgui-java-binding:<version>"
api "io.github.spair:imgui-java-lwjgl3:<version>"
api "io.github.spair:imgui-java-natives-linux:<version>"
api "io.github.spair:imgui-java-natives-macos:<version>"
api "io.github.spair:imgui-java-natives-windows:<version>"
Replace <version> with the latest version found at the top of the README file here.
Example Minimal Usage
The following instructions detail how ImGui can be used in a libGDX game. For easier use, you can put most of the methods in a specialised class, e.g. ImGuiRenderer.
-
Initialize ImGui. This has to be done once for your application, for example in
Game#create():private static ImGuiImplGlfw imGuiGlfw; private static ImGuiImplGl3 imGuiGl3; public static void initImGui() { imGuiGlfw = new ImGuiImplGlfw(); imGuiGl3 = new ImGuiImplGl3(); long windowHandle = ((Lwjgl3Graphics) Gdx.graphics).getWindow().getWindowHandle(); ImGui.createContext(); ImGuiIO io = ImGui.getIO(); io.setIniFilename(null); //Optional. Disables saving window layouts between sessions io.getFonts().addFontDefault(); io.getFonts().build(); imGuiGlfw.init(windowHandle, true); imGuiGl3.init("#version 150"); } -
Before you start using any of the ImGui methods in the
render()method of your screens, you need to start a new frame:private static InputProcessor tmpProcessor; public static void startImGui() { if (tmpProcessor != null) { // Restore the input processor after ImGui caught all inputs, see #end() Gdx.input.setInputProcessor(tmpProcessor); tmpProcessor = null; } imGuiGl3.newFrame(); imGuiGlfw.newFrame(); ImGui.newFrame(); } -
Then you can render any UI stuff you want, e.g.:
ImGui.button("I'm a Button!"); -
Afterwards, you need to actually render the ImGui frame:
public static void endImGui() {
   ImGui.render();
   imGuiGl3.renderDrawData(ImGui.getDrawData());

   // If ImGui wants to capture the input, disable libGDX's input processor
   if (ImGui.getIO().getWantCaptureKeyboard() || ImGui.getIO().getWantCaptureMouse()) {
      tmpProcessor = Gdx.input.getInputProcessor();
      Gdx.input.setInputProcessor(null);
   }
}
Your
render()method thus should look something like this:public void render() { startImGui(); ImGui.button("I'm a Button!"); endImGui(); } -
Be sure to dispose ImGui if you no longer need it:
public static void disposeImGui() { imGuiGl3.dispose(); imGuiGl3 = null; imGuiGlfw.dispose(); imGuiGlfw = null; ImGui.destroyContext(); } -
The result can look like this:
Option 2: kotlin-graphics’ Bindings
There is an elaborate wiki entry over in the Kotlin-graphics’s repo, detailing how ImGui can be used together with libGDX: https://github.com/kotlin-graphics/imgui/wiki/Using-libGDX
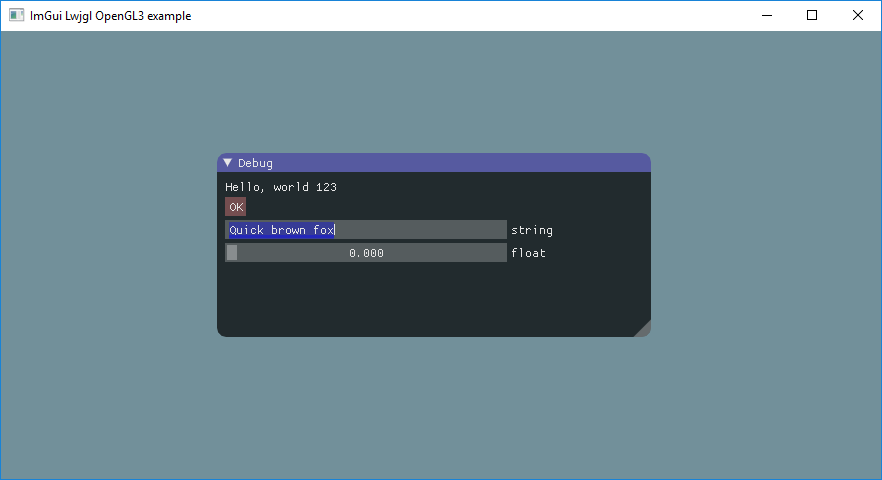
These are some very simple examples, how its usage may look like:
Kotlin
var f = 0f
with(ImGui) {
    text("Hello, world %d", 123)
    button("OK"){
        // react
    }
    inputText("string", buf)
    sliderFloat("float", ::f, 0f, 1f)
}
Java
ImGui imgui = ImGui.INSTANCE;
imgui.text("Hello, world %d", 123);
if(imgui.button("OK")) {
     // react
}
imgui.inputText("string", buf);
float[] f = {0f};
imgui.sliderFloat("float", f, 0f, 1f);
ImGui also supports other languages, such as Japanese, initialized here as:
IO.fonts.addFontFromFileTTF("extraFonts/ArialUni.ttf", 18f, glyphRanges = IO.fonts.glyphRangesJapanese)!!