Setting the Project Up
If you want to work on the code of libGDX itself or try out a PR, you need to get the libGDX code base set up on your local machine. If you plan on doing any modifications, we strongly recommend IntelliJ IDEA or Android Studio as IDEs, since they are better suited for working with Gradle and Android.
If you want to submit code back to the project, please also take a moment to review our guidelines.
- Fork libGDX to your own Github account.
- Clone the project to your machine either via your IDE or the command line:
git clone git://github.com/libgdx/libgdx.git
cd libgdx
If you want to reduce the size of the download, do a shallow clone (e.g.
git clone --depth 1 https://github.com/libgdx/libgdx). To automatically initialise and update the submodules in the repository (i.e. FreeType) pass the--recurse-submodulesargument. Please be aware that some of the generated filenames are rather long, which can lead to issues (i.e.,error: unable to create file [...]: Filename too long) if your repo is located in too many subfolders. - Fetch the native binaries, which were built on the snapshot build server. Even if you plan on building natives later yourself, it is recommended to bring these down so you can test your development environment is setup correctly before moving to the next step.
./gradlew fetchNativesPlease note that the
fetchNativesand thebuildtasks need to be called separately. -
If you want to modifiy the code, import it into your favorite IDE:
a) IntelliJ IDEA/Android Studio:
- File -> Open -> libGDX root
build.gradle - Import all projects
- Wait until everything is synced and indexed
- View -> Tool Windows -> Gradle, sync gradle button
- Make sure the Gradle sync succeeds, if not resolve the issues at hand.
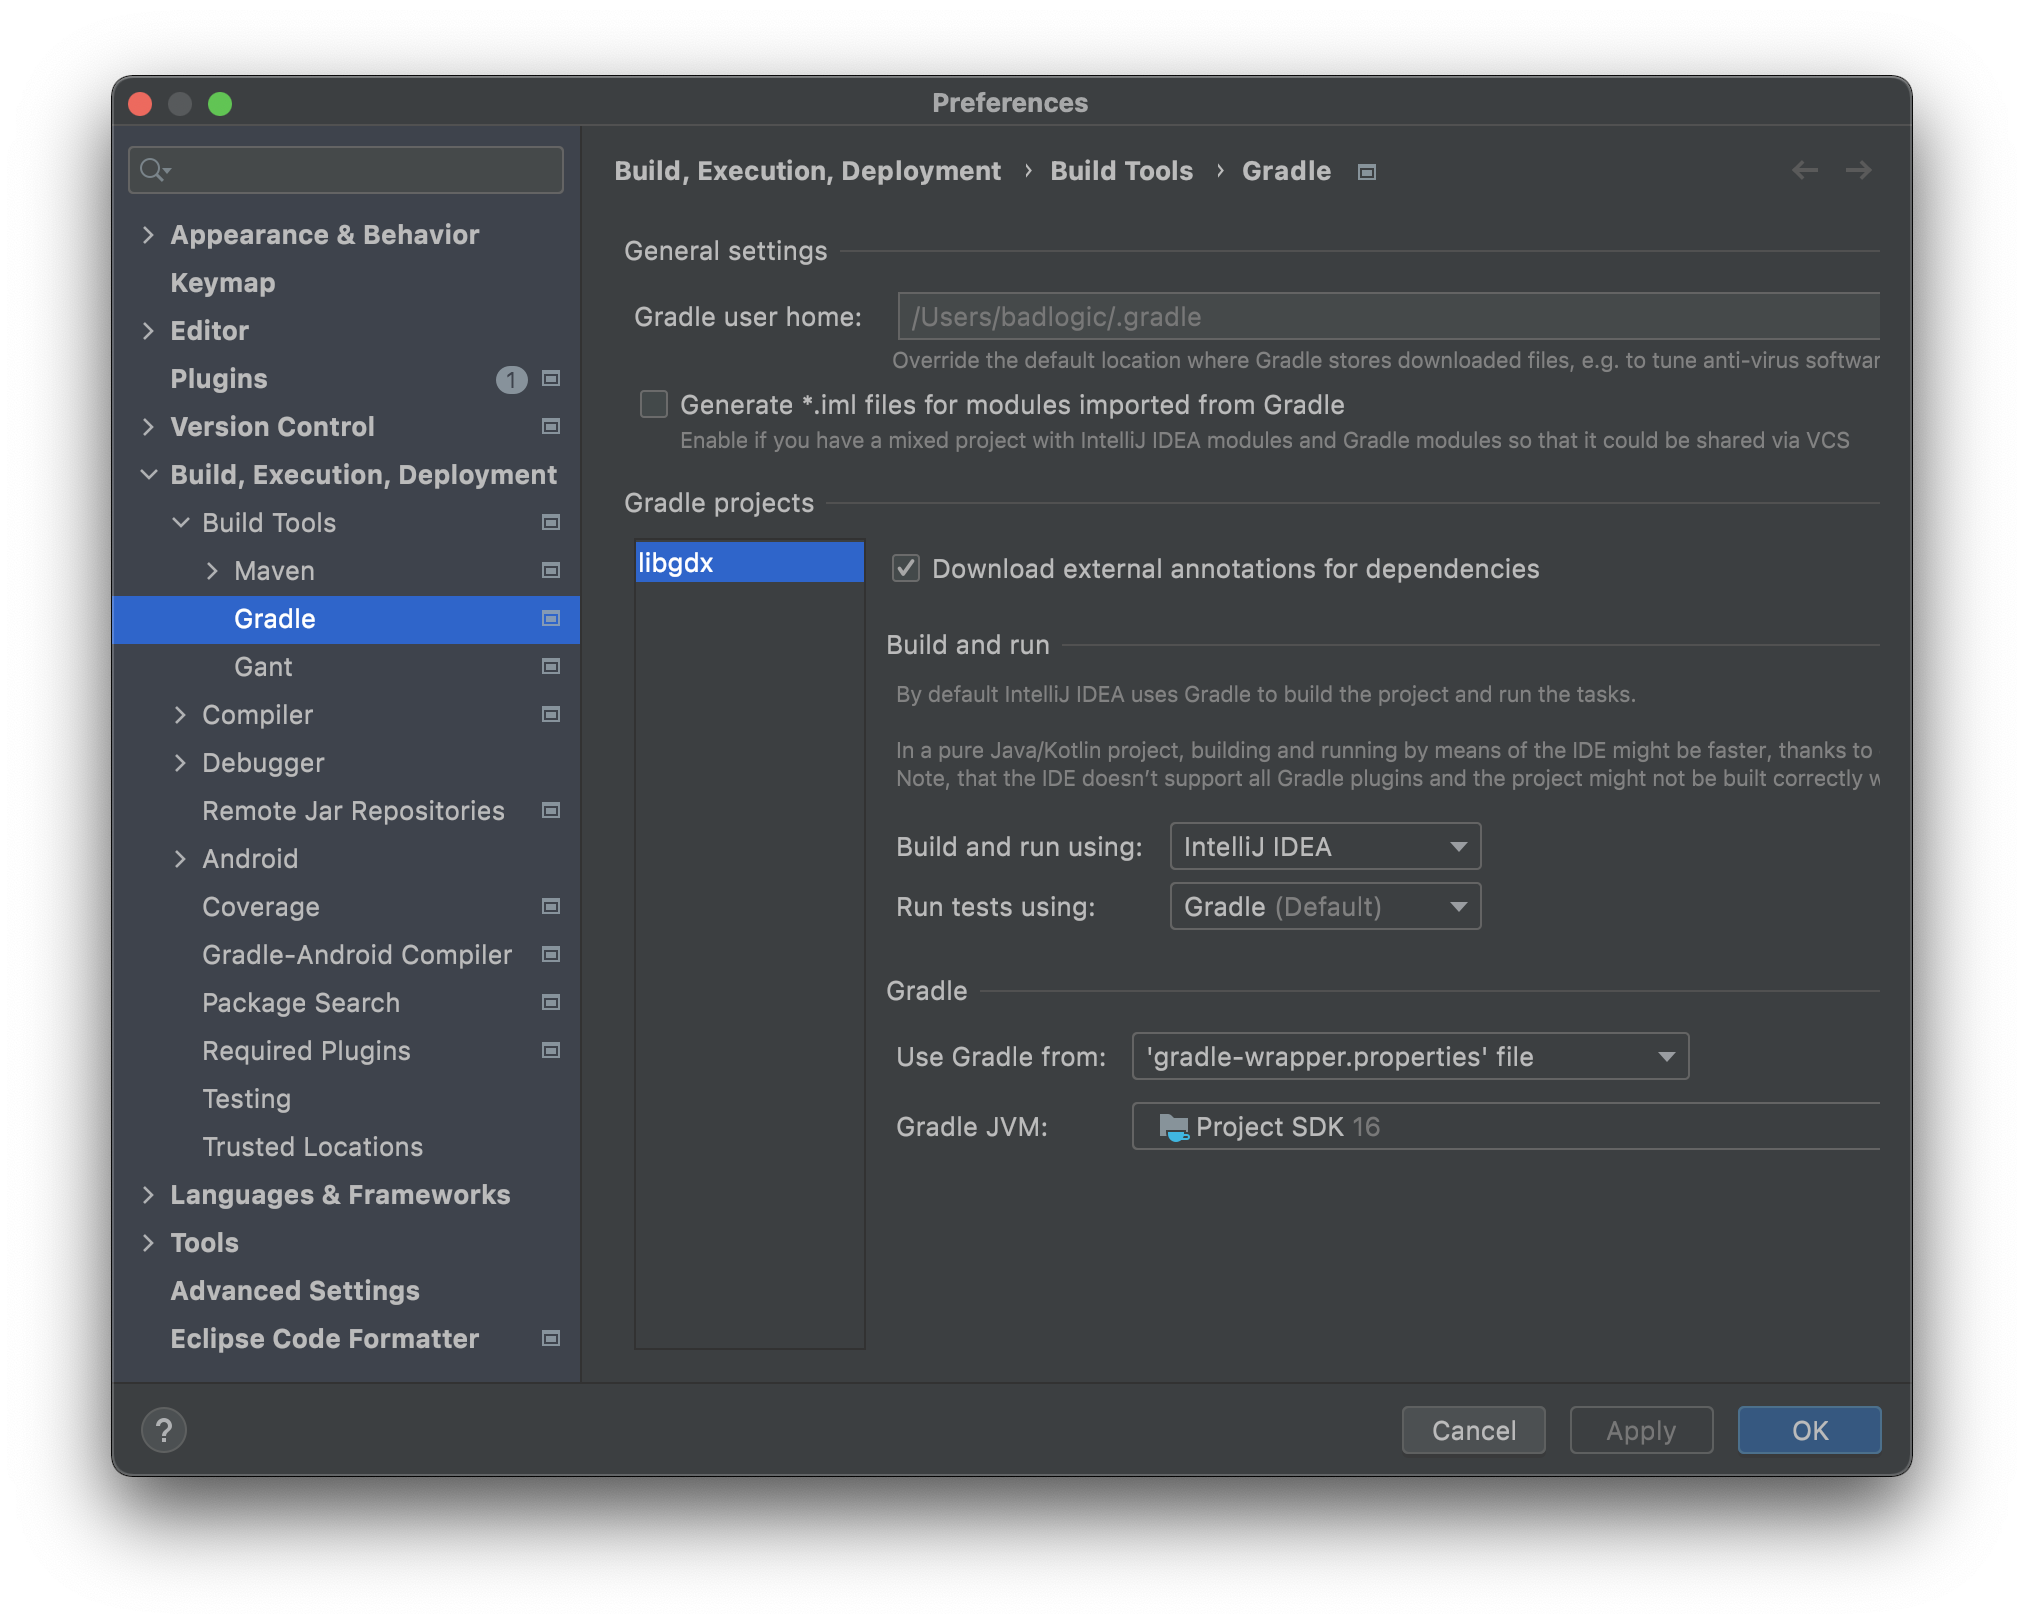
- Go into preferences and turn off configure on demand
b) Eclipse: File -> Import -> Gradle -> Gradle project
If you don’t want to use Gradle in Eclipse, executing
./gradlew cleanEclipse eclipsewill generate the necessary project files. - File -> Open -> libGDX root
You can optionally change the IntelliJ IDEA Gradle configuration to Build and run using IntelliJ IDEA instead of Gradle. This significantly reduces the time needed to start a test.
If you encounter any issues while setting up your development environment for libGDX, please join our community on Discord to ask for help.
Tests
If you set everything up correctly, you can try to give the libGDX tests a go.
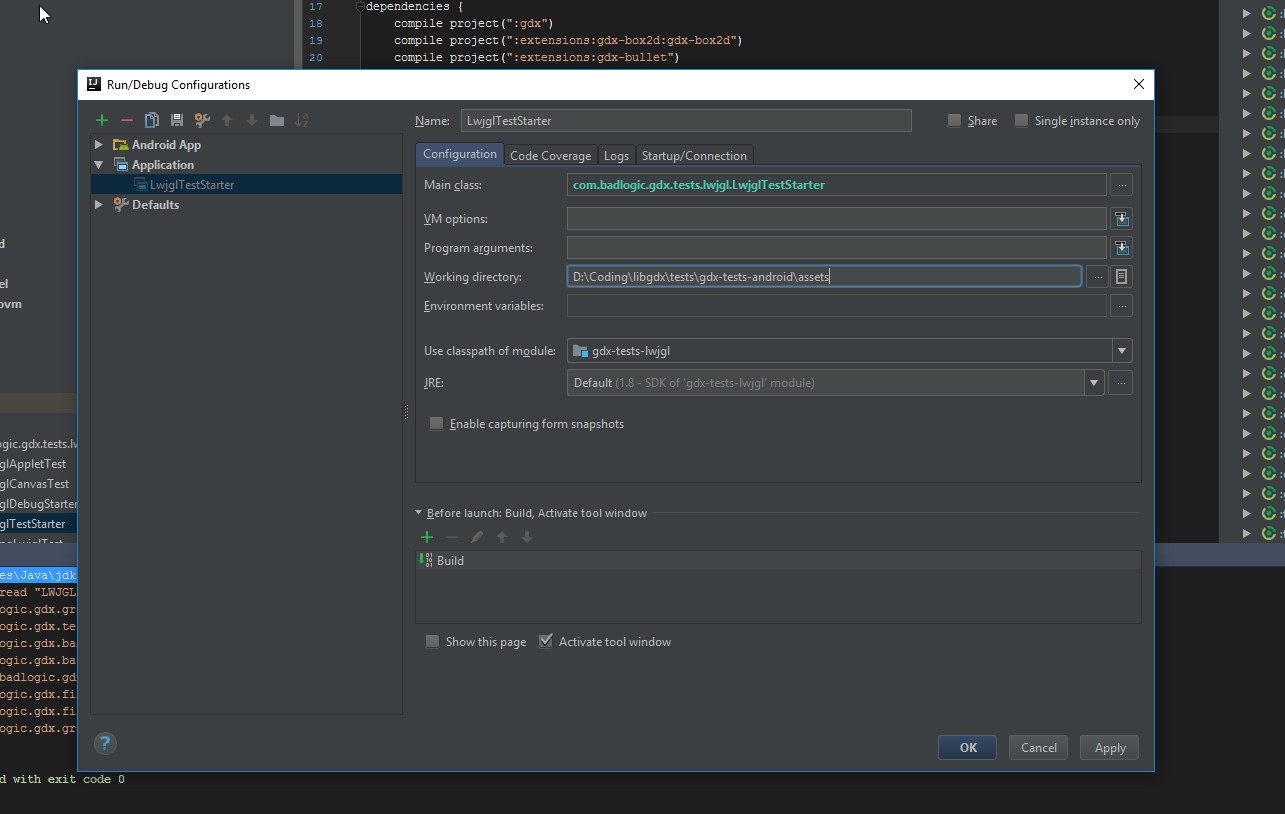
LWJGL/LWJGL3: Run the LwjglTestStarter class located in tests/gdx-tests-lwjgl/src (or tests/gdx-tests-lwjgl3/src respectively) by right clicking and running. You should get assets not found when you try to run a test, so edit the run configuration and point it to the correct assets folder (tests/gdx-tests-android/assets). For IntelliJ IDEA:
You can directly run individual tests and/or configure the test starter by setting its program arguments: [options] [Test class name], possible options being:
--angleenable the Angle emulation (default is disabled)--gl30enable GLES 3.0 with core profile 4.3 (or 3.2 for mcOS)--gl31enable GLES 3.1 with core profile 4.5 (LWJGL3 only)--gl32enable GLES 3.2 with core profile 4.6 (LWJGL3 only)--glErrorsenable GLProfiler and log any GL errors (default is disabled)- Note that
--gl30,--gl31, and--gl32options are mutually exclusive; when none of them are specified, GLES 2.0 is used.
Android: Use the following command to install the tests on the test device:
./gradlew tests:gdx-tests-android:installDebug
GWT: To access the tests at http://localhost:8080/index.html, start a local server as follows:
./gradlew tests:gdx-tests-gwt:superDev
GL30 emulation (WebGL 2.0) can be enabled via URL parameters : http://localhost:8080/index.html?useGL30=true
Building and Publishing
To use your local libGDX changes in another project you need to install it to a private repository.
Versioning
First recommended step is changing the version in gradle.properties to avoid conflicts with official release.
One option is to add an extra number to current version, for example changing version=1.12.0 to version=1.12.0.1.
Publishing a Snapshot version
You can install a libGDX snapshot version to your local Maven repository by running the following command:
./gradlew publishToMavenLocal
This will build and install libGDX and all core components to your local maven repository with the current version declared in the gradle.properties file plus the SNAPSHOT qualifier (in our example 1.12.0.1-SNAPSHOT). To use this version in your project, make sure that its build.gradle file includes mavenLocal() in the repositories section at the top.
Publishing a Release version
Publishing properties are defined in the publish.gradle file. To install a release version (i.e. a version that is not postfixed with -SNAPSHOT) in your local Maven, you can override the default repository by creating a file called override.gradle in the root folder with the following content
configure([
        project(":gdx"),
        project(":backends:gdx-backend-android"),
        project(":backends:gdx-backend-headless"),
        project(":backends:gdx-backend-lwjgl"),
        project(":backends:gdx-backend-lwjgl3"),
        project(":backends:gdx-backend-robovm"),
        project(":backends:gdx-backend-robovm-metalangle"),
        project(":backends:gdx-backend-gwt"),
        project(":extensions:gdx-box2d-parent"),
        project(":extensions:gdx-box2d-parent:gdx-box2d"),
        project(":extensions:gdx-box2d-parent:gdx-box2d-gwt"),
        project(":extensions:gdx-bullet"),
        project(":extensions:gdx-freetype"),
        project(":extensions:gdx-lwjgl3-angle"),
        project(":extensions:gdx-lwjgl3-glfw-awt-macos"),
        project(":extensions:gdx-tools")
]) {
    afterEvaluate { project ->
        publishing.repositories {
            // Add your repositories
        }

        gradle.taskGraph.whenReady {
            tasks.withType(Sign) {
                onlyIf { false }
            }
        }
    }
}
You can build and install a libGDX release version to your local Maven repository (or any private repo you configure) with the current version declared in the gradle.properties by running:
gradlew.bat -PRELEASE publishToMavenLocal
Local project dependency
If you want to include a local libGDX project as dependency without having to publish it after every change, add includeBuild "<path-to-libgdx-repo>" to a settings.gradle file in your other project.
Natives
If you want to build the libGDX natives yourself, you can find instructions here.